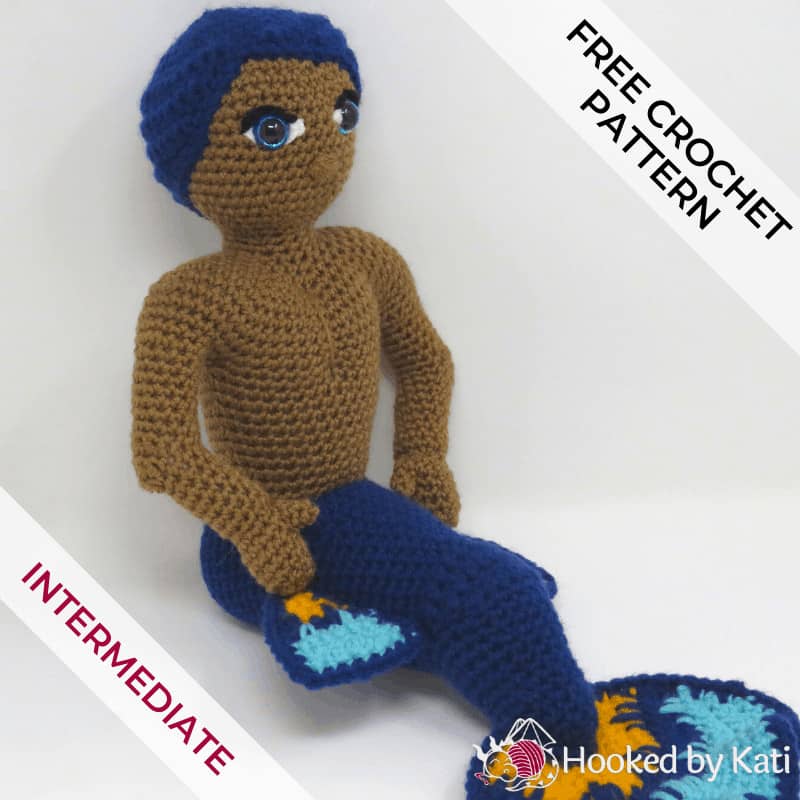
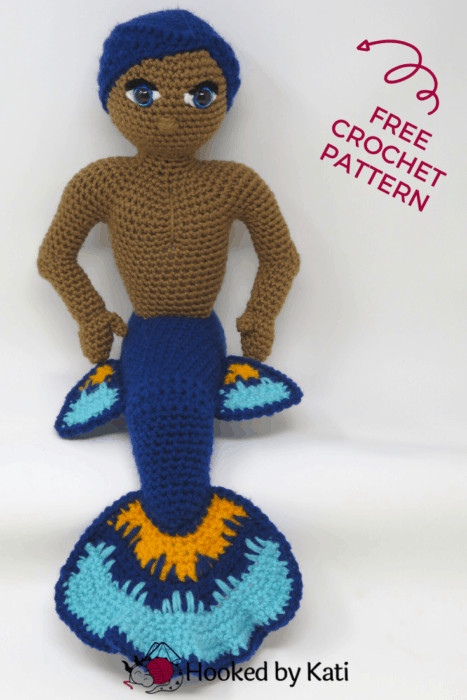
Carter the Betta Merman | Free Crochet Pattern
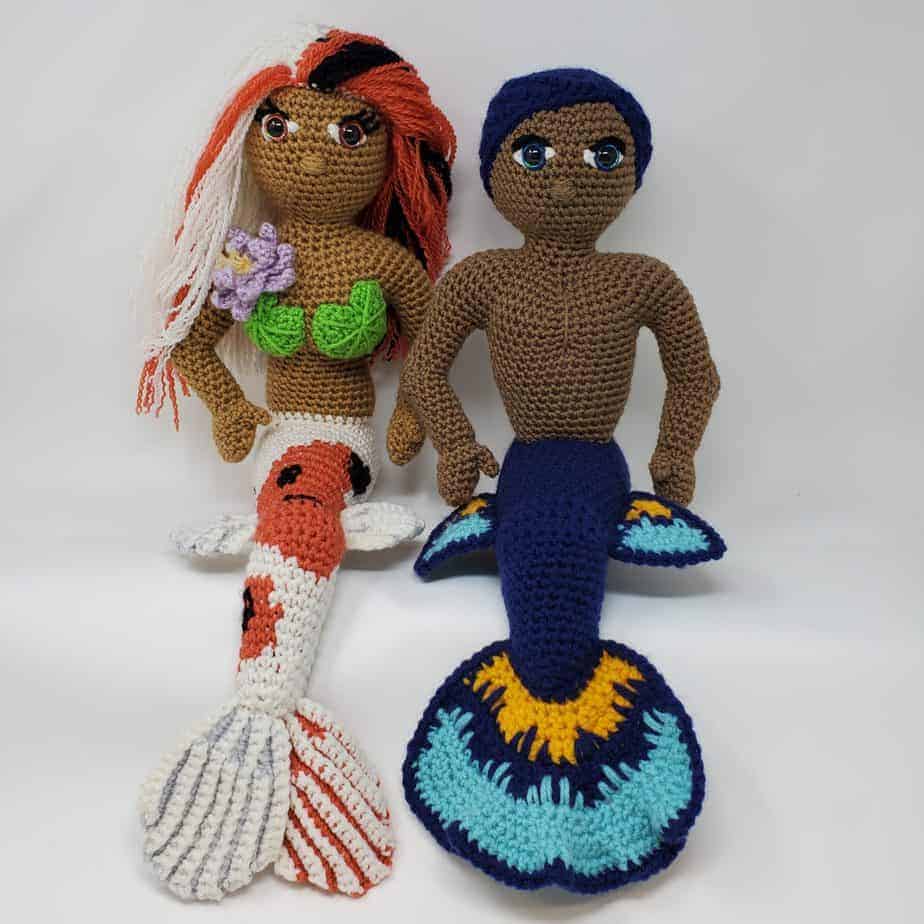
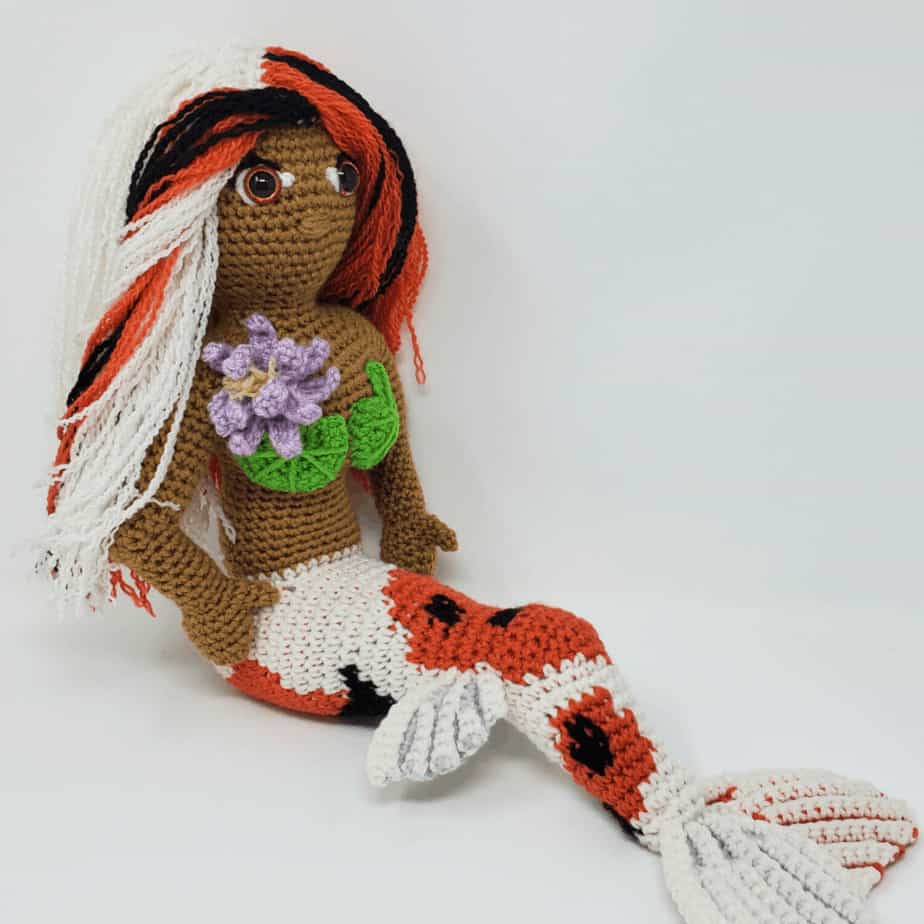
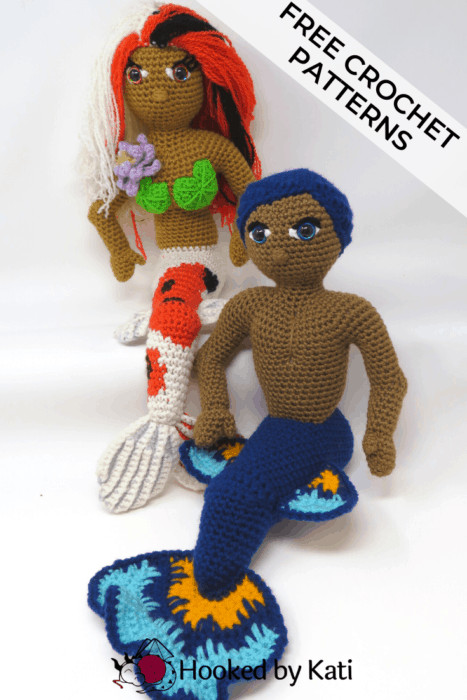
An amigurumi betta merman doll is the perfect complement to a koi mermaid. Fish-tails add a unique twist to the popular crochet plushy pattern.
I decided a merman was just the thing the 2021 Mythical Creatures collection needed. Plus, Grace needed a pal to go swimming with. Her dragon roommates aren’t big into swimming. (Wet wings…you know how it goes.)
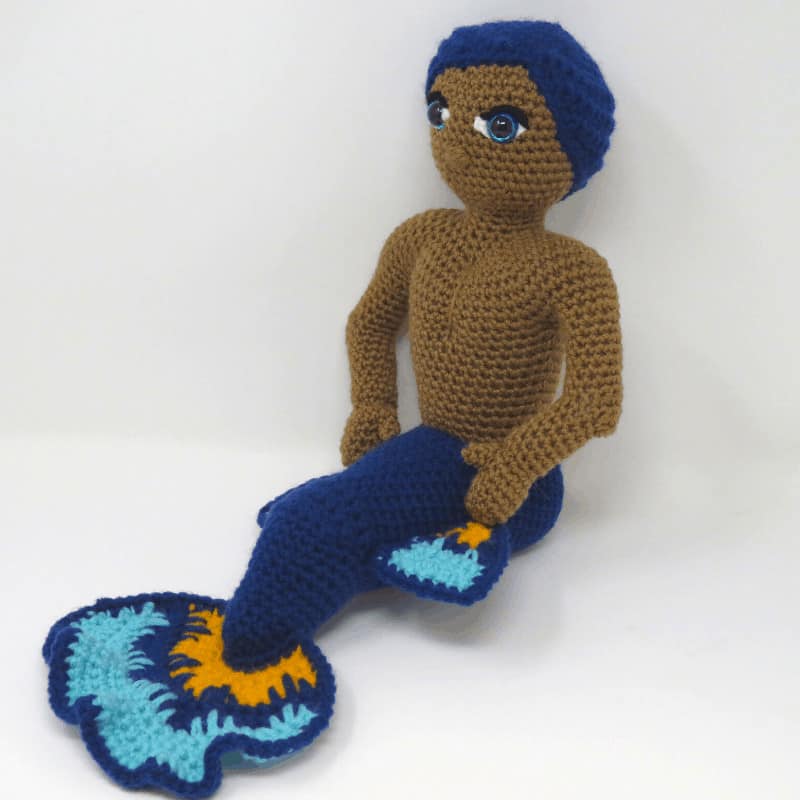
I LOVE Betta Fish. I have had several over the years. Recently, I found a Paradise Betta in a store and fell in love with the color combination. Brilliant blue with bold yellow inspired me to make another mer-person, but this time, a dude. A flashy dude, like a betta fish. 🙂
I also have a small betta fish pattern who would be a great companion to Carter.
Construction
The Betta Merman pattern is a top down head and body with arms that branch off the body.
His tail is separate so he can sit on a shelf with his fins trailing over the edge. And his wavy tail fins are striped using spike stitches, one of my favorite ways to add a little texture and interest to stripes.
The spikes as well as the short rounds have photo walkthroughs in the Premium Pattern that make this pattern much faster and easier than figuring it out on your own. You’ll really love this one. It’s very fun to put together and makes an awesome doll.
You can purchase Carter’s pattern here, by itself, or you can get both Carter & Grace together.
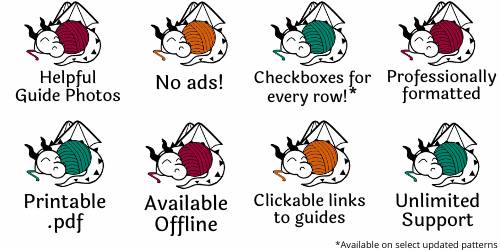
This pattern is also available as a Premium Pattern! Premium Patterns are ad-free, printable .pdf files, professionally formatted and edited, with extra tutorial photos not available in the free version, and print-only perks, like checkboxes for every round*!
Premium Patterns are available in the Hooked by Kati Shop, Ravelry, and Etsy.
Love them both?
Why not get the together! Premium Patterns for the Koi Mermaid and Betta Merman are bundled here. Make them both for the perfect pair of fish-themed mer-friends.
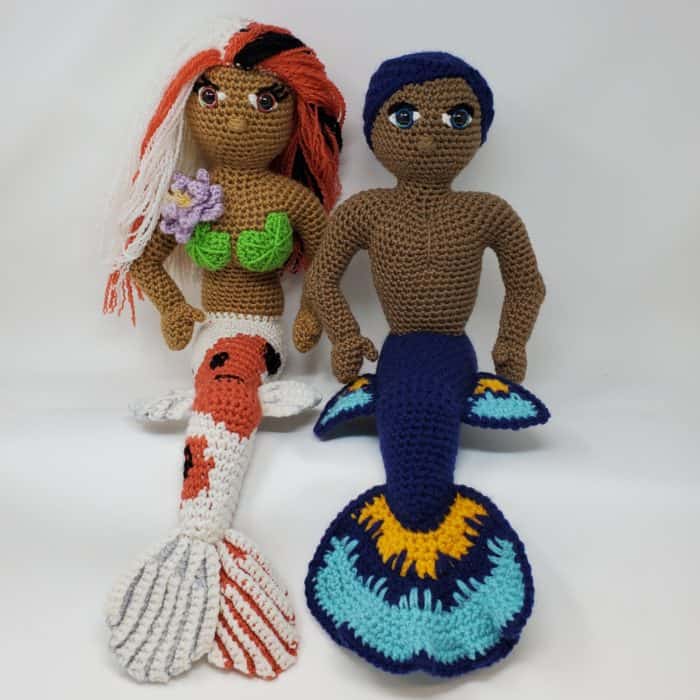
Betta & Koi Mermaid Couple | Premium Pattern Bundle
The Premium Pattern Collection includes Carter the Betta Merman & Grace the Koi mermaid. They are printable, ad-free, professionally formatted, professionally tech edited patterns, with TONS of extra guide photos not included in the free version and a chart for the tapestry colorwork in the koi tail.
Carter the Betta Mermaid
Pattern is written in English, in US terms, using Craft Yarn Council abbreviations.
Intermediate. Knowledge needed of chains (ch), slip stitch (sl st), single crochet (sc), half double crochet (hdc), double crochet (dc), BLO (back loops only), increases and decreases. Knowledge of amigurumi part attachment and embroidery is recommended. Pattern uses short rounds for shaping.
Supplies
- Red Heart Super Saver yarn, 100% acrylic, worsted weight, 364 yds/7 oz/198 g, Café Latte (CAFÉ), 1 ball; Soft Navy (NAVY), 1 ball; Saffron (SAF), < 1 ball; Turqua (TUR), < 1 ball; White (WHT), < 1 ball; Black (BLK), < 1 ball.
- G (4.00 mm) Furls hook
- Two 15mm colored round-pupilsafety eyes
- Polyfil stuffing
- Tapestry needle
- Straight pins
- Stitch Marker
Measurements
12” tall, seated, 13” tail and fins
Gauge
8 sts x 8 rows in sc = 2” x 2”
Pattern Notes
- Work in continuous rounds. Do not slip stitch unless otherwise specified by the pattern.
- For best results, assemble parts in order as directed
- Rounds labeled “Short round” are worked back and forth and will end before the round is complete, leaving stitches deliberately unworked, to be worked in later rounds as instructed.
- When instructed, an additional sc will be added at the end of a round to move the starting stitch of the next round to the left.
- When preparing to attach Tail Fin and Side Fins, sew along edge of the piece to move the sewing tail to a useful place. This way you can use the sewing tail to attach parts. Alternatively, weave in all ends and use a long piece of scrap yarn in NAVY to attach these parts.
Pattern Stitches
- Sc join – Single crochet join: Slip knot in yarn, loop slip knot over hook, insert hook through stitch, yarn over, pull through, yarn over, pull through both loops on hook.
- SPsc 1 row below – Spike single crochet 1 row below: Insert hook into st one row below working st, yarn over, draw up a loop, yarn over, pull through both loops on hook.
- SPsc 2 rows below – Spike single crochet 2 rows below: Insert hook into st two rows below working st, yarn over, draw up a loop, yarn over, pull through both loops on hook.
Instructions
Thank you for sticking around and reading my patterns right here on the blog, without copy/pasting. When you stay here to follow patterns, I am compensated for my time and energy. This is a great, free way to support a designer. If you would like to save this for later, press CTRL + D to bookmark the page or click the heart/star on your mobile browser.
Head and Body
With CAFE, ch 2.
Rnd 1: 6 sc in second ch from hook. (6)
Rnd 2: Inc in each st around. (12)
Rnd 3: [Sc, inc] 6 times. (18)
Rnd 4: [2 sc, inc] 6 times. (24)
Rnd 5: [3 sc, inc] 6 times. (30)
Rnd 6: [4 sc, inc] 6 times. (36)
Rnd 7: [5 sc, inc] 6 times. (42)
Rnds 8-17: Sc evenly around.
Rnd 18: [5 sc, dec] 6 times. (36)
Rnd 19: [4 sc, dec] 6 times. (30)
Rnd 20: [3 sc, dec] 6 times. (24)
Rnd 21: [2 sc, dec] 6 times. (18)
Rnd 22: [4 sc, dec] 3 times. (15)
Rnd 23: Sc evenly around.
Rnd 24: [4 sc, inc] 3 times. (18)
Rnd 25: [2 sc, inc] 6 times. (24)
Rnd 26: [2 sc, inc] 8 times. (32)
Rnd 27: [3 sc, inc] 8 times. (40)
Rnd 28: [4 sc, inc] 8 times. (48)
Rnd 29: [5 sc, inc] 8 times. (56)
Rnd 30: [6 sc, inc] 8 times. (64)
Rnds 31-33: Sc evenly around.
Rnd 34: Skip 15, 5 sc, inc, 4 sc (place marker), inc, 4 sc, inc, sc, skip 15, 5 sc, inc, [5 sc, inc] twice, sc. Leave skipped sts unworked for future use. (see Pattern Notes) (40)
Do not break yarn. Complete eyes, nose, and neck reinforcement before continuing Body.
Marked st is center front of body. Using marked st as reference to center, work eyes and nose as instructed.
Eyes
With pins, mark two sts between Rnds 12 and 13, 6 sts apart.
With different color pins, count 2 sts to the right of the first pin, mark. Count 2 sts to the left of first pin, mark. Mark sts directly above and below first pin. Repeat around other pin.
With long strand of WHT, using these four pins as a guide to sew a diamond around each center pin. Repeat so that diamonds are 2 strands thick.
Thread needle up through inside corner of either eye. Thread needle under all 4 strands coming from that st and wrap the yarn around them once. Thread needle back through same st. This creates the inside corner of the eye. Repeat on other eye.
Eyebrows
With strand of BLK, sew line from outside corner of eye to top point of WHT diamond, and from top point to st behind/under the inside corner of the eye. Repeat over same sts to make eyebrows 2 strands thick.
Nose
Count down 2 rnds from bottom edge of eyes. Sew horizonal line 3 sts long, centered between the eyes. Repeat sewing over this line 6-8 times until the nose looks right to you.
Insert safety eyes through the marked center points of the diamonds. Attach washers.
Stuff head firmly.
Neck Reinforcement
With CAFE, ch 2.
Rnd 1: 10 sc in second ch from hook. (10)
Rnd 2: [sc, inc] 5 times. (15)
Rnds 3-7: Sc evenly around.
Rnd 8: [Sc, dec] 5 times. (10)
Stuff very firmly.
Insert into neck, to add strength. Sew in place if desired. If neck reinforcement pushes into head, remove and stuff head more firmly before adding neck reinforcement.
Body (cont.)
Pick up yarn from Rnd 34 and continue working on body.
Rnd 35: Sc evenly around. (40)
Rnd 36: [Dec, 18 sc] twice. (38)
Rnd 37: Sc evenly around.
Rnd 38: [Dec, 17 sc] twice. (36)
Rnd 39: Sc evenly around.
Rnd 40: [Dec, 16 sc] twice. (34)
Rnd 41: Sc evenly around.
Rnd 42: [Dec, 15 sc] twice. (32)
Rnd 43: Sc evenly around.
Rnd 44: [Dec, 14 sc] twice. (30)
Rnd 45: Sc evenly around.
Bind off leaving long tail for sewing.
Stuff. Make sure to stuff shoulders and chest full.
Chest Sculpting (Pecs)
With strand of CAFÉ, thread yarn in through back of body at mid back and out through the front center st of Rnd 26, in through center front st of Rnd 34, back out through starting st on back of body.
Thread yarn back out the back of the body through the starting point. Pull ends until chest puckers slightly. Knot ends together. Hide the knot by threading the tails back through the same hole as the knot and out the bottom of the piece. Cut off excess tails.
Arms
Rnd 1: With CAFE, sc join (see Pattern Stitches) on 1st skipped st of either arm opening of Rnd 34 of the body, 14 sc. (15)
Rnd 2: Sc evenly around.
Rnd 3: [3 sc, dec] 3 times. (12)
Rnds 4-9: Sc evenly around, after Rnd 8, (left arm only: 2 sc to move starting st), turn. (see Pattern Notes) (12)
Stuff upper arm and shoulder.
Rnd 10: (WS) (Short Rnd) (see Pattern Notes) 6 sc, leave remaining 6 sts unworked, turn. (6)
Rnd 11: (RS) (Short Rnd) 5 sc, leave remaining st unworked, turn. (5)
Rnd 12: (WS) (Short Rnd) 4 sc, leave remaining st unworked, turn. (4)
Rnd 13: (RS) (Short Rnd) 3 sc, leave remaining st unworked, turn. (3)
Rnd 14: (WS) (Short Rnd) 2 sc, leave remaining st unworked, turn. (2)
Rnd 15: (RS) (Short Rnd) 2 sc. (2)
Rnd 16: (RS) Work around including unworked sts from previous rnds, 12 sc. (12)
Rnds 17-24: Sc evenly around.
Stuff.
Rnd 25: [Sc, dec] 4 times. (8)
Rnd 26: Inc in each st around. (16)
Rnd 27 (left arm only): Sc evenly around.
Rnd 27: (right arm only): 14 sc, leave remaining 2 sts unworked to move starting st. (14)
Rnd 28: (Thumb) Skip 12, 4 sc, leave skipped sts unworked for future use. (4)
Rnds 29-30: Sc evenly around. (4)
Cut yarn. Thread needle through front loops of remaining 4 sts. Pull tightly to close. Weave in this end.
Hand
Rnd 29: With CAFÉ, sc join in 1st skipped st of Rnd 28, 11 sc. (12)
Rnds 30-31: Sc evenly around.
Stuff hand and wrist.
Rnd 32: Dec 6 times. (6)
Cut yarn. Thread needle through front loops of remaining 6 sts. Pull tightly to close. Weave in this end.
Repeat on other arm hole.
Using the starting tails from the sc joins, close the gaps between parts with an ‘X.’
Tail
With NAVY ch 2.
Rnd 1: 6 sc in second ch from hook. (6)
Rnd 2: Inc in each st around. (12)
Rnd 3: [Sc, inc] 6 times. (18)
Rnd 4: [2 sc, inc] 6 times. (24)
Rnd 5: [3 sc, inc] 6 times. (30)
Rnd 6: [4 sc, inc] 6 times. (36)
Rnds 7-16: Sc evenly around.
Rnd 17: [16 sc, dec] twice. (34)
Rnd 18: Sc evenly around.
Rnd 19: 7 sc, dec, 15 sc, dec, 8 sc. (32)
Rnd 20: Sc evenly around.
Rnd 21: [14 sc, dec] twice. (30)
Rnd 22: Sc evenly around.
Rnd 23: 6 sc, dec, 13 sc, dec, 7 sc. (28)
Rnd 24: Sc evenly around.
Rnd 25: [12 sc, dec] twice. (26)
Rnd 26: Sc evenly around.
Rnd 27: 5 sc, dec, 11 sc, dec, 6 sc. (24)
Rnd 28: Sc evenly around, turn.
Rnd 29: (WS) (Short Rnd) Do not chain, 12 sc, leave remaining 12 sts unworked, turn. (12)
Rnd 30: (RS) (Short Rnd) Do not chain, 11 sc, leave remaining st unworked, turn. (11)
Rnd 31: (WS) (Short Rnd) Do not chain, 10 sc, leave remaining st unworked, turn. (10)
Rnd 32: (RS) (Short Rnd) Do not chain, 9 sc, leave remaining st unworked, turn. (9)
Rnd 33: (WS) (Short Rnd) Do not chain, 8 sc, leave remaining st unworked, turn. (8)
Rnd 34: (RS) (Short Rnd) Do not chain, 8 sc. (8)
Rnd 35: (RS) Work around including unworked sts from previous rnds, 24 sc. (24)
Rnd 36: Sc evenly around.
Stuff.
Rnd 37: [10 sc, dec] twice. (22)
Rnds 38-39: Sc evenly around.
Rnd 40: 4 sc, dec, 9 sc, dec, 5 sc. (20)
Rnds 41-42: Sc evenly around.
Rnd 43: [8 sc, dec] twice. (18)
Rnds 44-45: Sc evenly around.
Finish stuffing.
Rnd 46: [Sc, dec] 6 times. (12)
Rnd 47: Sc evenly around.
Rnd 48: Dec 6 times. (6)
Cut yarn. Thread needle through front loops of remaining 6 sts. Pull tightly to close. Weave in ends.
Tail Fin
With SAF, ch 13.
Row 1: Sc in second ch from hook, 3 sc, inc, 2 sc, inc, 4 sc, turn. (14)
Row 2: Ch 1, 5 sc, inc, 2 sc, inc, 5 sc, turn. (16)
Row 3: Ch 1, 6 sc, inc, 2 sc, inc, 6 sc, turn. (18)
Row 4: Ch 1, 7 sc, inc, 2 sc, inc, 7 sc, turn. (20)
Row 5: Change to NAVY, ch 1, [sc, SPsc 1 row below, SPsc 2 rows below (see Pattern Stitches), SPsc 1 row below, sc] 4 times, turn. (20)
Row 6: Ch 1, 8 sc, inc, 2 sc, inc, 8 sc, turn. (22)
Row 7: Ch 1, 9 sc, inc, 2 sc, inc, 9 sc, turn. (24)
Row 8: Ch 1, 10 sc, inc, 2 sc, inc, 10 sc, turn. (26)
Row 9: Change to TUR, ch 1, [sc, SPsc 1 row below, SPsc 2 rows below, SPsc 1 row below, sc] twice, sc, SPsc 1 row below, [SPsc 2 rows below] twice, SPsc 1 row below, sc, [sc, SPsc 1 row below, SPsc 2 rows below, SPsc 1 row below, sc] twice, turn. (26)
Row 10: Ch 1, dec, 2 sc, [inc, 3 sc] 5 times, dec, turn. (29)
Row 11: Ch 1, dec, 2 sc, inc, [3 sc, inc] 5 times, 2 sc, dec, turn. (33)
Row 12: Ch 1, dec, 2 sc, inc, [3 sc, inc] 6 times, 2 sc, dec, turn. (38)
Row 13: Ch 1, dec, 2 sc, [inc, 3 sc] 8 times, dec, turn. (44)
Row 14: Ch 1, dec, 2 sc, inc, [3 sc, inc] 9 times, sc, dec, turn. (52)
Row 15: (Border) Change to NAVY, ch 1, 52 sc, do not turn, sc in the end of each row back down to starting ch, 12 sc across starting ch, sc in the end of row back up to last row, sl st in top of 1st st to join. (92)
Bind off leaving long tail for sewing.
On narrow end of tail, with short rounds (bend) facing up, place a pin at the center st of the last round of the tail. Place pins 6 sts on either side in a straight line up either side of the tail.
Using pins as a guide, sewing along 12 sts on the starting ch (the curved yellow section of the Tail Fin), sew Tail Fin to Tail. (see Pattern Notes)
Side Fins
(Make 2)
With SAF, ch 2.
Row 1: (RS) 2 sc in second ch from hook, turn. (2)
Row 2: (WS) Ch 1, inc, sc, turn. (3)
Row 3: Ch 1, inc, 2 sc, turn. (4)
Row 4: Ch 1, inc, 3 sc, turn. (5)
Row 5: Change to NAVY, ch 1, sc, SPsc 1 row below, sc, SPsc 1 row below, sc, turn. (5)
Row 6: Ch 1, inc, 4 sc, turn. (6)
Row 7: Change to TUR, ch 1, sc, SPsc 1 row below, 2 sc, SPsc 1 row below, sc, turn. (6)
Row 8: Ch 1, inc, 5 sc, turn. (7)
Row 9: Ch 1, inc, 6 sc, turn. (8)
Row 10: Ch 1, 2 sc, hdc, 2 dc, hdc, 2 sc, turn. (8)
Row 11: (Border) Change to NAVY, ch 1, 8 sc, sc in the end of each row down toward starting point, 3 sc in starting ch, sc in the end of each row up toward last row, sl st in 1st st to join. (29)
Bind off leaving long tail for sewing.
Using pins, mark a line 12 sts long down the side of the tail from Rnd 16-29. The bottom of the side fins will touch the widest point of the first short round.
Using these pins as a guide, sew Side Fins to Tail, RS facing up. (see Pattern Notes)
Body/Tail Attachment
On the top side of the tail, use pins to mark an 8 x 7 rectangle between Rnds 7 and 14.
Using pins as a guide, sew the body to the top of the tail, facing toward the narrow end of the tail. Finish stuffing body firmly before completing attachment.
Hair Cap
With NAVY, ch 2.
Rnd 1: 6 sc in second ch from hook. (6)
Rnd 2: Inc in each st around. (12)
Rnd 3: [Sc, inc] 6 times. (18)
Rnd 4: [2 sc, inc] 6 times. (24)
Rnd 5: [3 sc, inc] 6 times. (30)
Rnd 6: [4 sc, inc] 6 times. (36)
Rnd 7: [5 sc, inc] 6 times, turn. (42)
Rnd 8: (WS)Do not chain, 40 sc, leave 2 sts unworked, turn. (40)
Rnd 9: (RS) Do not chain, 37 sc, leave 3 sts unworked, turn. (37)
Rnd 10: (WS)Do not chain, 35 sc, leave 2 sts unworked, turn. (35)
Rnd 11: (RS) Do not chain, 32 sc, leave 3 sts unworked, turn. (32)
Rnd 12: (WS) Do not chain, 30 sc, leave 2 sts unworked, turn. (30)
Rnd 13: (RS) Do not chain, 27 sc, leave 3 sts unworked, turn. (27)
Rnd 14: (WS) Do not chain, 23 sc, leave 4 sts unworked, turn. (23)
Rnd 15: (RS) Do not chain, 19 sc, leave 4 sts unworked, turn. (19)
Rnd 16: (WS) Do not chain, 15 sc, leave 4 sts unworked, turn. (15)
Rnd 17: (RS)Do not chain, 11 sc, leave 4 sts unworked, turn. (11)
Rnd 18: (WS) Do not chain, 7 sc, leave 4 sts unworked, turn. (7)
Rnd 19: (RS) Do not chain, work around including unworked sts from previous rnds, 42 sc, sl st in 1st st to join.
Bind off leaving long tail for sewing.
Place on head with the inward point of hair “swoop” over the left eye. Pin in place.
Attach Hair Cap by sewing through BLO of hair. Be sure to stretch hair tightly on head.
Weave in all attachment ends when parts are positioned as desired.

All finished? Share your artwork by posting a picture in the Gallery!!
Post comments and pictures on social media with the hashtag #hookedbykati, or tag me @hookedbykati. You can also post pictures on the Facebook Page, or in the Hooked by Kati Crochet Community Facebook Group.
You may sell products made by this pattern, but please link back to hookedbykati.com or credit Hooked by Kati on the craft fair tag. Do not copy this pattern for distribution or sale; that’s not nice and also illegal.
If you run into a snag, drop me a line! I respond quickly and will help any way I can to clarify any confusion or challenging stitches.
Find more free patterns like this at allfreecrochet.com.
Here are a few more free crochet patterns you might like:
The other Mythical Creature patterns of 2021! Get them all as Premium Patterns with your Plus membership!
GRACE THE KOI MERMAID
WONDER THE BIRTHDAY DRAGON
EMBER THE PHOENIX
CHARLIE THE CELESTIAL DRAGON
BABINEAUX THE OWLCAT
Yarn on,
Kati
Kati is the designer behind Hooked by Kati. With thousands of patterns sold around the world, Kati prides herself in creating innovative, easy-to-follow amigurumi patterns. She has designed for several publications, including Crochet!, Crochet World, Simply Crochet, and I Like Crochet. Kati finds her inspiration in science fiction, video games, and numerous visits to the zoo — all passions she shares with her husband and two boys.