Thank you for sticking around and reading my patterns right here on the blog, without copy/pasting. When you stay here to follow patterns, I am compensated for my time and energy. This is a great, free way to support a designer. If you would like to save this for later, press CTRL + D to bookmark the page or click the heart/star on your mobile browser.
This page contains affiliate links. If you choose to purchase after clicking a link, I may receive a commission at no extra cost to you.
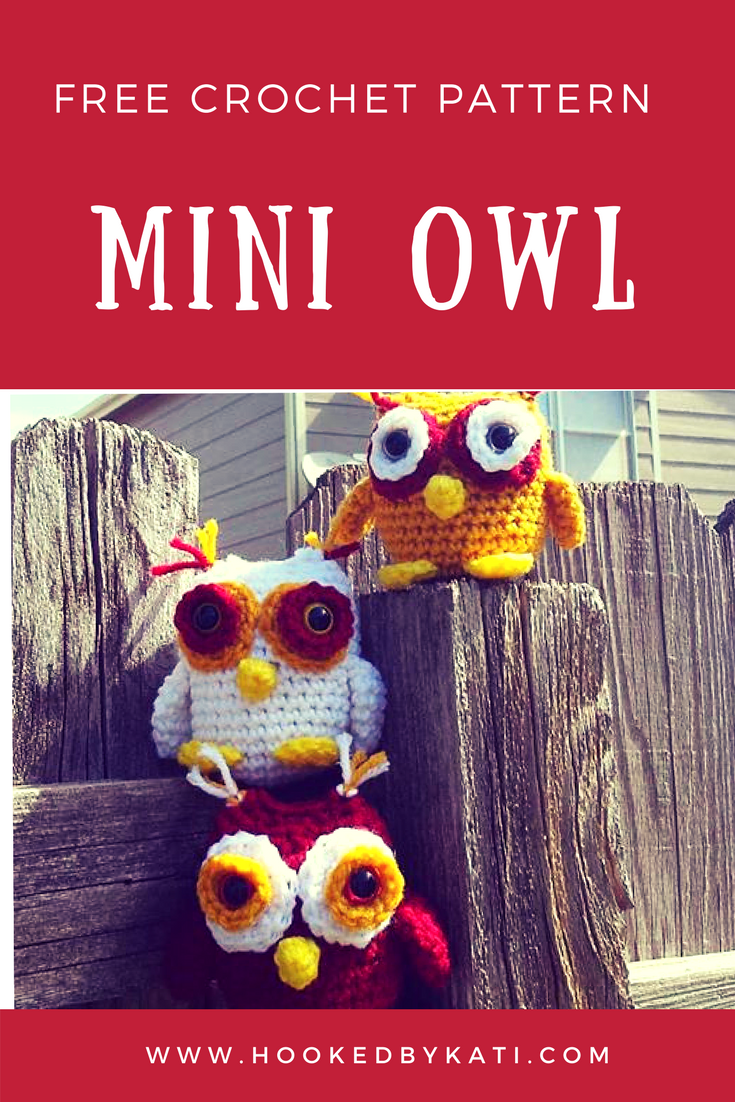
Mini Owlet
Owls are adorable. With their big eyes, and their round faces, it’s no wonder they are so popular. This is the tiny version of my owl. He’s fun to make, fun to play with, and a great starter project!
You may sell products made by this pattern, but please link back to hookedbykati.etsy.com or credit Hooked By Kati on the craft fair tag. Do not copy this pattern for distribution or sale. That’s not nice.
Finished owls stands about 4 inches tall, when using Red Heart Super Saver Yarn. Gauge is not important.
Beginner pattern. Need to have knowledge of single crochet (sc), double crochet (dc), increases and decreases, working in the round, and amigurumi stuffing and part attachment (with yarn needle). This is a great toy to learn with.
Supplies
About 30 yds (1/8 skein) any color Red Heart Super Saver (or similar worsted weight) yarn for body and wings – Main Color (MC)
Scrap yarn in any color Red Heart Super Saver (or similar worsted weight) yarn for large eye circles – Accent Color 1 (AC1)
Scrap yarn in any color Red Heart Super Saver (or similar worsted weight) yarn for small eye circles – Accent Color 2 (AC2)
Scrap yarn in any color Red Heart Super Saver (or similar worsted weight) yarn for beak and feet – Accent Color 3 (AC3)
Polyfil
Stitch marker
Yarn Needle
For all parts, do not slip stitch to join rounds. Work in continuous rounds. Use stitch markers to signify the beginning of the round to help you count stitches.
Thank you for sticking around and reading my patterns right here on the blog, without copy/pasting. When you stay here to follow patterns, I am compensated for my time and energy. This is a great, free way to support a designer. If you would like to save this for later, press CTRL + D to bookmark the page or click the heart/star on your mobile browser.
Body
With MC, chain 2.
Rnd 1: sc 6 in second chain from hook. (6)
Rnd 2: [2sc in next stitch] 6 times. (12)
Rnd 3: [2sc in next stitch, sc 1] 6 times. (18)
Rnd 4: [2sc in next stitch, sc 2] 6 times. (24)
Rnd 5: [2sc in next stitch, sc 3} 6 times. (30)
Rnd 6-16: sc around. (30)
Rnd 17: [sc2tog, sc 3] 6 times. (24)
Rnd 18: [sc2tog, sc 2] 6 times. (18)
Rnd 19: [sc2tog, sc 1] 6 times. (12) Bind off. Stuff.
Press remaining stitches flat and sew together in a straight seam, allowing to bunch slightly on the ends for “ears.”
Large Eye Circle (Make 2)
With AC1, chain 2.
Rnd 1: sc 6 in second chain from hook. (6)
Rnd 2: [2sc in next stitch] 6 times. (12)
Rnd 3: [2sc in next stitch, sc 1] 6 times. (18)
Slip stitch in next two stitches to help keep circle round. Bind off leaving a long tail for sewing.
Small Eye Circle (Make 2)
With AC2, chain 2.
Rnd 1: sc 6 in second chain from hook. (6)
Rnd 2: [2sc in next stitch] 6 times. (12)
Slip stitch in next two stitches to help keep circle round. Bind off and weave in ends.
Wings (make 2)
With MC, chain 2.
Rnd 1: sc 6 in second chain from hook. (6)
Rnd 2: sc around. (6)
Rnd 3: [2sc in next stitch] 6 times. (12)
Rnd 4-5: sc around. (12)
Rnd 6: [sc2tog, sc 2] 3 times. (9)
Bind off leaving long tail for sewing.
Feet (make 2)
With AC3, chain 4.
Rnd 1: dc 5 in second chain from hook.
Bind off leaving long tail for sewing.
Beak
With AC3, chain 2.
Rnd 1: sc 6 in second chain from hook. (6)
Rnd 2: sc around. (6)
Bind off leaving long tail for sewing.
Tip: Do not weave in ends on part attachment until you have all the parts where you want them and the owl looks just right.
Lay small eye circles on top of large eye circles. Insert
safety eye through the center of the layered eye circles. Use the
safety eye back to attach the eye and the two circles together.
. Sew the eyes to the body, centered under each “ear,” using the long tail on the large eye circle.
Press wings flat and sew onto the sides of the body, in line with the bottom of the eye circles (about Row 12).
4. Whip stitch beak between eye circles, centered on the body.
5. Whip stitch feet two stitches apart at about round 5 of the body, centered under the eye circles.
For “ear fuzz”, cut 2 pieces of AC1 and AC2. Place the hook through the top of one ear, loop one piece of each color around the hook, pull the loop through, then wrap the ends of the yarn around the hook and pull them through the loop. Pull tight and cut to desired length. Repeat on other ear.
(Visited 2,772 times, 1 visits today)
Kati is the designer behind Hooked by Kati. With thousands of patterns sold around the world, Kati prides herself in creating innovative, easy-to-follow amigurumi patterns. She has designed for several publications, including Crochet!, Crochet World, Simply Crochet, and I Like Crochet. Kati finds her inspiration in science fiction, video games, and numerous visits to the zoo — all passions she shares with her husband and two boys.


I LOVE this pattern. I wish I could post some pictures here of the ones I’ve made (at least 18 so far). Beelzebub is a demon owl and has fiery feathers. Brad is a custom owl with a bowler hat and fancy eyes. Most represent different countries in my International Owls collection that signifies the need for global cooperation during the pandemic and beyond. Please let me know if you would like a picture or two as examples.
I would LOVE to see your owls! They sound amazing! You can email pictures to kati@hookedbykati.com or post them in the Facebook group at http://www.facebook.com/groups/hookedbykati
2 stitches in one stitch don’t you mean increase?
So cute!!!!!:)
Love your critters…they’re so expressive!
Thank you so much! 🙂